Monday, August 20, 2012

2011 Projects 001: Bracelets

Since everybody knows I love bracelets, I figured I'd show off some that I made last year, without going into detail (because I really don't remember for a lot of them).

Stripes and Stretch.

Green anodized aluminum with white EPDM rubber and bright aluminum in Euro 4-in-1

Spiraled Mess -  I was trying to make Half Persian 3-in-1, but I screwed up and this happened.  

Magenta anodozied aluminum with black and white EPDM rubber in Spiral 4-in-1. 

Future that Never Was

Typewriter key pendants with green acrylic cubes on a black and sliver chain.

Earth in Cages - lovely earth toned beads in silver bead cages

Spirals in Spirals

Spiral links in hammered gold, silver, and copper plated wire.

Original Helm

Untreated copper and silver plate wire in Helm Chain.


Friday, August 17, 2012

Project 010: Ornamented Leather

I picked up on pre-punched leather bracelets and screw on ornaments from Michaels when I saw them on the clearance rack. I got more bracelets than screw ons, so I still have to figure out what to do with the rest, although I have an idea for at least one.

The Results:
This was actually harder than it looks, because the holes and the screws didn't line up...

It was actually pretty fun to do. I wish there had been more of the bracelets and a better selection of ornaments, but I guess that's what I get for waiting until it's on clearance.

Thursday, August 16, 2012

Project 009: Wind

Have I mentioned how MUCH I love bracelets?

They're easy to wear. A good one will go with so many outfits. Crazy bracelets never seem to go out of style.

Have I mentioned how much I love chain maille?

Inspiration: Bastardized Byzantine Bias

New Technique Learned:

  • Bastardized Byzantine Bias weave
The results:
Wind

When I first started making chain maille jewelry back in college, I made myself a red, orange, and silver cuff using a Japanese variation weave, which I called fire. My thought then was to do a set of elemental inspired bracelets. A few years later, I did another bracelet in two tones of blue and green in aura weave, which I called water.

This is wind, in yellow and blue, with silver accents, in a byzantine variation. I wish the AR was a little tighter on this; the silver rings don't hold the weave well unless stretched.

Like this.

Oh well. Either way, I'm pretty happy with it. It's lovely and shiny.

Shiny is good.
I haven't made earth yet. I'm still trying to decide on a good weave. I want something that feels heavy and chunky. <3


Friday, August 10, 2012

Project 008: Braids and Chains

I love bracelets.

The only type of jewelry that I have more of are earrings. I've actually slowed down on making earrings, because I've already got way too many.

Friendship style bracelets have been super popular this year, which is great, since I've got a huge  bag of embroidery floss left from when I was in high school and my friends and I made TONS of braided friendship bracelets.

I also discovered Pinterest, which enabled me to find a few hundred bracelet styles to try.

Here's the first.

Inspiration/Pattern: Woven Chain Bracelet

New Techniques Learned:

  • Braiding on chains
The results:
Bright and sunny! 
I'm really into orange and yellow right now...

Still love green and purple though!

This one's a little small, however. I might need to add another link or two on the bar end of the toggle.
These are stupidly fun to make. Both of these were made with up-cycled chains. I'm really having trouble finding nice chains to make more of these. It might be time for another around of thrift shop hunting. I really want to make one with green and pink floss and then put watermelon charms on the other side... a future project, perhaps.

Thursday, August 9, 2012

Project 007: As American as Apple Pie

More jewelry!

When I ordered the supplies to make the Blue Sparkle bracelet, I received a free gift of acrylic baseball beads. How they knew I loved baseball, I'll never know. With this awesome free gift in hand, I decided to make myself something to wear during baseball games. At first, I planned to make hair bobbles.

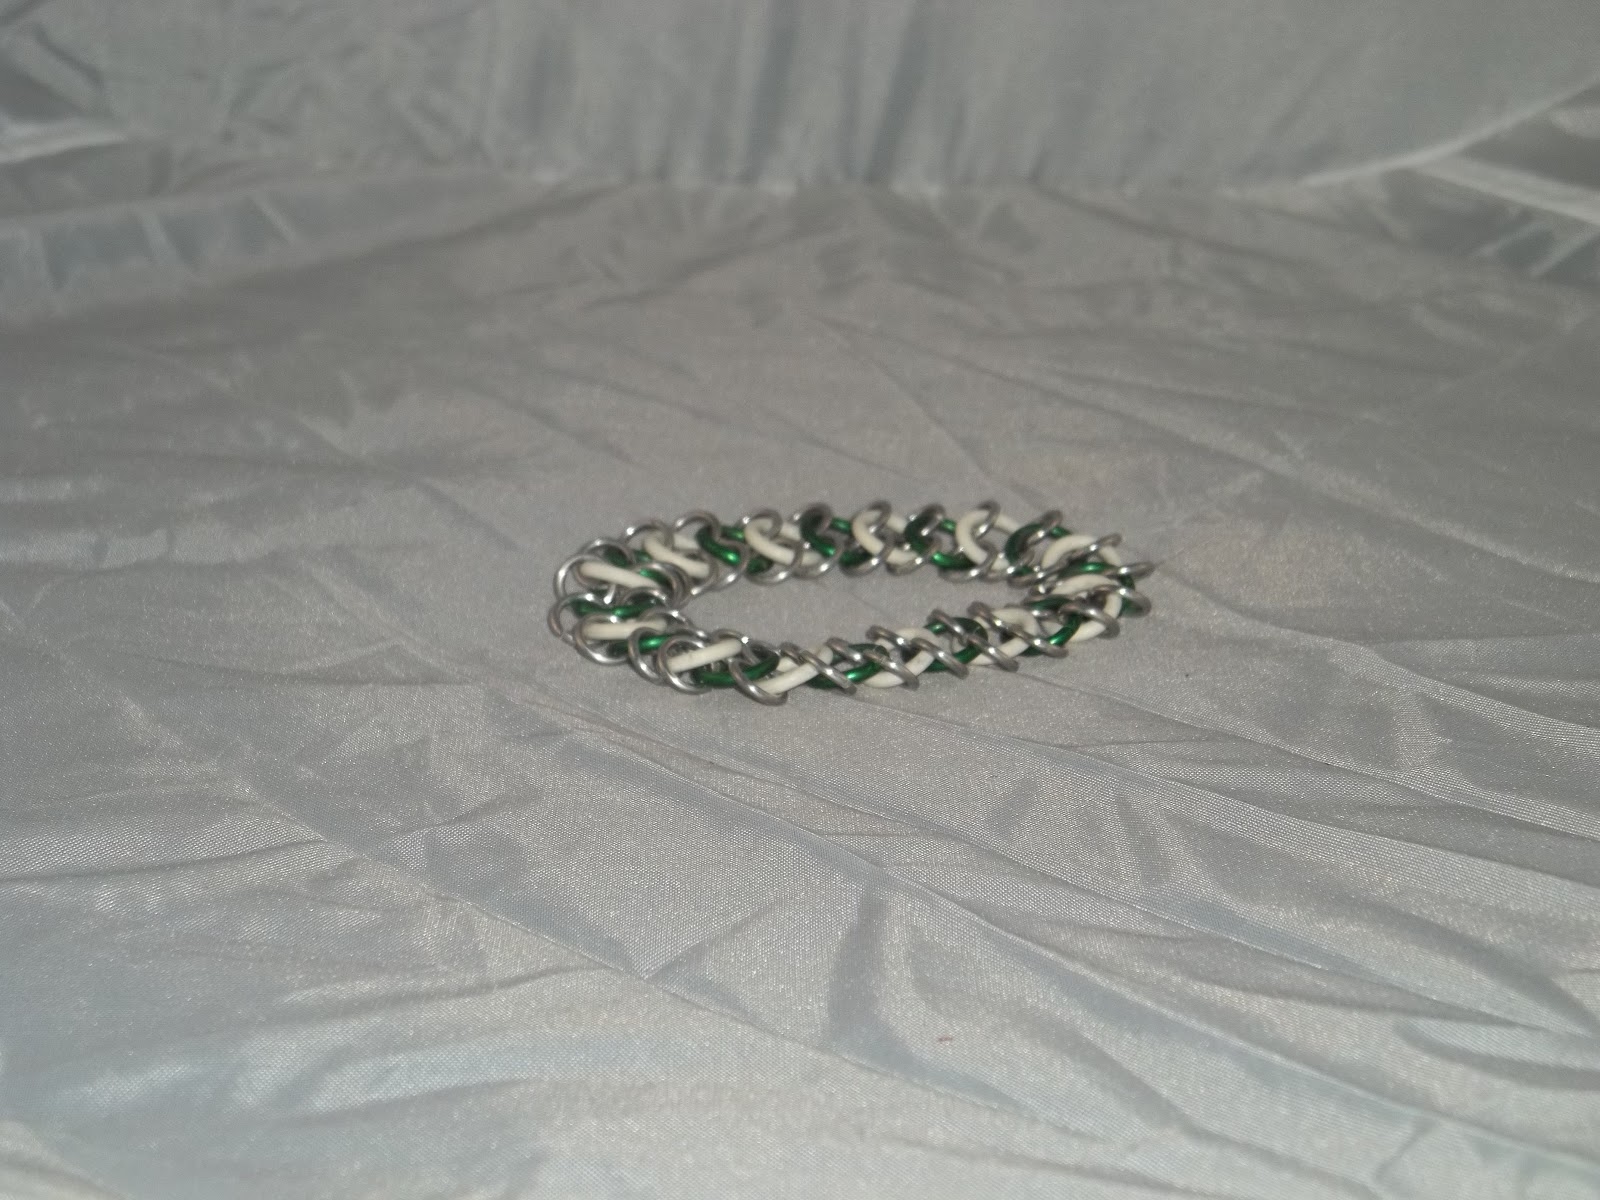
Then I made this instead:
Chainmaille and baseballs!

And it's stretchy!
I combined some simple European 4-in-1 in 16 gauge anodized red aluminum and white EPDM rubber with the acrylic beads for this one. 

New Techniques Learned:
  • None. Euro 4-in-1 was the first weave I learned, which really spawned my love of jewelry making and over all renewed interest in crafting.

Wednesday, August 8, 2012

Project 006: Blue Sparkle

Finally, some jewelry!

I've made jewelry for my sister for all of her formal dances since 8th grade, so when she asked if I would make her a bracelet to go with her prom dress, how could I say no?

Inspirations:
Cats Eye and Celestial Crystal Bracelet

The dress. Sorry it's blurry; this was taken with a cell phone.

New Techniques Learned:
  • Stringing pattern (Not sure if it has a name)
The Results:
Sparkly!

Matches the dress pretty well, I think.

Lin liked it, so I suppose that's all that matters!

Tuesday, August 7, 2012

Tutorial 001: Scented Rice Packs

As promised in Project 005, here is the tutorial for the method I use to make rice packs. 

Scented Rice Packs

Materials:

  • A 1lb bag of rice (I've also heard that people make these with buckwheat, so if you choose that route, buy an equivalent amount)
  • A piece of remnant fabric at least as big as the bag of rice
  • Thread
  • Pins
  • Herb/Dried flowers for scent (I used mint, surprised?)
  • Sewing machine
  • Scissors 
  • Funnel
  • Chopstick (or other thin object for poking out corners)
  • Hand sewing needle

The materials
1. Lay out your fabric, with right sides together.

Mine's got folds, because I'm too lazy to iron for this project.

2. Measure your fabric, using the bag of rice. Place the bag against the fold on the bottom. 


This part is super technical and precise.

3. Cut.


My remnant was obviously way bigger than I needed...

4. Pin.


Don't stick your fingers. That sucks.

5. Check the settings on your sewing machine and thread.


I leave mine at 2 for most projects, which is a zig-zag stitch.

6. Begin sewing from the fold. I use about 1/4 inch seams. At the corner, put the needle down and lift the foot. Turn the work 90 degrees and continue. Repeat at the second corner.


Start at the fold and save yourself the trouble of having to start and stop too much.

7. Leave a 1/2 - 1 inch gap at the end. You'll need this gap to turn the work and fill it.


Don't sew all the way to the last corner. You'll only have to rip it out...

8. Turn the work. Use the chopstick to poke the corners all the way out, if needed.

Turned.

9. Open your bag of rice and mix with your herbs/flowers for scent.

Ignore my khakis, please.

10. Place your funnel into the opening and begin filling your pack.

This took some time. I need a funnel with a wider bottom.

11. Fill it until it's as full as you would like. I used all the rice and mint in mine. It's very firm. If you'd like a softer pack, don't fill it all the way.

Almost done...

12. Thread your hand needle and begin stitching the opening closed. Use whatever stitch you're most comfortable with. 

Mine's a little messy, but it works; the rice doesn't leak out.

13. Knot the thread and enjoy.

All done!

Directions for use:
  • Microwave for approximately 1 minute. If you microwave it too long, the rice will burn and then no amount of mint will cover the smell.
  • Wrap the pack in a light towel and apply to wherever you have aches or pains. The pack will be VERY hot when it's first heated. 

Monday, August 6, 2012

Project 005: Mint Scented Rice Pack

My problem is not so much that I don't craft.

It's that I'm a lazy bitch when it comes to photographing anything.

I hate trying to get a decent photograph in my house. It's an old house and we haven't bothered to update most of the lighting, so much of my lighting has a yellow hue.

It probably didn't help that the room I take most of my photos in is orange.

Either way, I decided to not be lazy, and took some photos (and take photos off my camera, something ELSE I'm notoriously lazy about).

So, this project. A long, long time ago (and not in a galaxy far away; it was in Selinsgrove, at my mom's house), we discovered this lovely project. Instead of paying an arm and a leg for microwaveable heat packs, we'd make our own, with remnant fabric and rice...

I took this (please ignore my messy table)...


And made it into this!
New techniques learned:
  • None (I've already made this before, so nothing to learn this time)
Next? I've got some jewelry already photographed, all the photos ready for the companion tutorial for this project, plus I'm working on a tutorial for the I-pom scarf. I'm also working on projects for my Halloween costume, so expect those. I promise to TRY not to be such a lazy ass when it comes to posting (but don't hold me to anything.)

Sunday, April 22, 2012

Project 004: Rainbow I-Pom

A few months ago, I was looking through various knitting techniques online and stumbled upon I-cord. I instantly wanted to make something with it, but couldn't figure out what. My first thought was to make a really long I-cord and then join it together at the ends and wear it looped about my neck multiple times like a t-shirt necklace. This may still happen.

Instead, this happened: 


As modeled by my faithful crafting partner, Pretty Pretty Princess Miachu.


Please excuse crappy self-photo, nobody else with thumbs was home!
Long scarf is long.


A beautiful, long, variegated rainbow I-cord, paired with two huge white pom-poms. I shall call it I-Pom! XD

New techniques learned:
  •  I-cord knitting
I already knew how to make pom-poms from a scarf I made last year for my sister, which I'll post here sometime if I ever get photos (or just make one for myself, which is way more likely).

Next? Maybe jewelry. I have a bunch of things that need repaired, plus a repair job for a coworker, and the supplies I need to make my sisters jewelry for prom will be coming on Tuesday...

Thursday, April 12, 2012

Project 003: the light shines in the darkness

So, I was totally making a Valentine's Wreath and then got really close to the end and didn't finish it. Now that Easter's past, I don't think I'm going to be finishing it anytime soon.


Oh well.


So I made some art work instead!


To be honest, I didn't try anything new this time. I did use the colored and weighted line art again. I'm still undecided on it; I need to play with it more, I think.

Next project? Ehhh... I've got some old artwork that needs matted and framed, a couple of sketches that can be cleaned up and finished, a few knitting projects that I've been wanting to tackle, some jewelry pieces to mix, upcycle, and make. So I guess it'll be something, and hopefully soon!

Tuesday, February 7, 2012

Project 002: Save a Horse, Ride a Cowboy

I made an art! XD


View "Save a Horse, Ride a Cowboy" at My DeviantArt Page


New Techniques:
  • Colored Line Art
  • Weighted Line Art
I'm still not sure how I feel about the colored line art. I think I like it. I need to play with it more before I can make up my mind.

Thursday, January 12, 2012

Project 001: Black and White Scarf

Finally, my first project is complete! :D


The Inspiration:
Fluffy and polka dots...


and heart shaped with sparkly bows! <3


These are some totally ridiculous earmuffs that my lovely mother-in-law got me for Christmas. Heart shaped and they have sparkly bows on them!


But, oh noes! I have no scarf to go with them. Good thing I can knit!


The Pattern: Drop Stich Drama Scarf


New Techniques Learned:
  • Drop/Elongated Stitch
  • Knitting with multiple strands
The Results:
The full scarf, stretched out on my couch


Close up of the stitch work
This was FUN to do. It took me at LEAST twice as long to complete as the estimate on the pattern, but then again, I'm easily distracted by the TV, facebook, words with friends, deviantart, looking at other patterns on ravelry, and pretty much anything else shiny, colorful, or furry that passes in front of my face. Also, I'm not a fast knitter. I'm definitely getting better the more I do it though!


I'm very excited to wear this set to work tomorrow, just to see what my coworkers say. As a group of (mostly) older ladies, it's always interesting to get their opinions on my knitting and jewelry escapades. :p


So, with one project behind me, it's time to move to the next one on the list. I think it's gonna be another knitting project. :D Then there will be an art project. And then a wreath project. If I'm not too lazy, I may pull photos off my phone and camera of some of the projects I did last year, just for kics.

Wednesday, January 4, 2012

The Purpose

The thing that makes a creative person is to be creative and that is all there is to it.  - Edward Albee

While dreaming up my New Years resolutions for 2012, I realized that of my goals, the one most likely to be shoved aside was the desire to be more creative in more ways this year. I have this bad, bad habit of starting projects and never finishing them, of getting distracted by things, and of being flat out lazy when I really want to do something.

To combat this, I decided to start a blog, of all things. My reasoning? If I made myself accountable, even if it's only to the computer, I will finish things, try new things, get a little dirty, have some fun, and maybe even make a buck or two while I'm at it.


Which brings us to The Purpose:
  1. To document the multitude of projects that I want to create this year: knitting projects, art, a couple of small home improvement projects, jewelry, and whatever else should strike my fancy.
  2. To compile a list of resources for use (my own and anyone that might follow this blog) and re-use: websites, tutorials, sites for buying/acquiring materials
  3. To provide tutorials for projects that I have developed
  4. To review tutorials for projects that I do and my findings on them
  5. To post things that inspire me to create or inspire projects that I am working on/have planned
As such, posts will be labeled accordingly: "Project", "Resource", "Tutorial", "Review", "Inspiration". This list is subject to change, addition, deletion, or whatever else I may feel it needs.

So, with all that said, there's a scarf waiting for me to knit it. See you at the end of the next project!